

How To Create Webmail In Godaddy
Create a Website on GoDaddy in 13 Easy Steps
 It's easy to feel a bit lost when you're building your first website. You might be sitting there thinking, how do I build a website on GoDaddy? Our step by step guide will take you by the hand and lead you through each stage – the destination? Your very own GoDaddy website!
GoDaddy wears many hats in the digital world, providing everything from domains to hosting, but one of its most popular services is its website builder.
We tested out GoDaddy's website builder ourselves, alongside the best brands on the market. Overall, we enjoyed using GoDaddy – it really stood out for its user-friendly layout and design-assisted builder.
It's super easy to use, because it uses ADI (Artificial Design Intelligence) to actually help you build your website. When you enter the type of website you want, it automatically creates an example site for you to edit. You can imagine how much time and technical effort that saves!
This makes GoDaddy best for total beginners, or those who need a website up as quickly as possible – it's the fastest website builder in the west (or anywhere, really.)
Where it fell down was its rather plain looks, and its lack of features – you won't get a powerful or complex website out of GoDaddy, but you will get a simple, speedy site live in a matter of minutes. Check out its star ratings below for the full picture!
![]()
If you want to find out how we put GoDaddy through its paces, read about our testing process in our article: How We Conduct Our Website Builder Research. If you think you might need something a bit more sophisticated, take our quiz to find the best website builder for you.
GoDaddy comes with aone-month free trial. So whether you're nervous about creating your first site, or are chomping at the bit to get started, you can get building without spending a single cent.
With that said, let's take our first step along the winding path of website building. We'll show you exactly how to build a website with GoDaddy. We'll journey through the setup process, how to customize your site, and the steps you need to take before publishing. We're with you every step of the way, so put your best foot forward, and let's get going!
1
Choose Your Site Type
The very first thing you need to do is decide which type of website you want to build. If you want to sell online, you'll need to select the online store option. If you won't be accepting payments through your website, then you should select the website builder option.

Don't worry, this decision isn't set in stone – if you change your mind down the line, you can always add an online store to your website later.
In this step-by-step guide, we'll be showing you how to build a website rather than an online store, although a lot of the steps are similar.
Before you move on, make sure you've:
- Decided which type of website you need
- Selected the right option on GoDaddy's website
2
Start Your Free Trial
GoDaddy has a one-month free trial, which is definitely worth making the most of. You can practise these steps and get your site ready on the free trial, then choose to upgrade (or not) when your trial draws to a close.
That means you can learn how to use GoDaddy without spending a single cent!

It's easy to start your free trial – just click any of the Start for Free buttons on GoDaddy's website, then create an account. It's totally free, and you don't need to enter any credit card details to sign up.
All you need is an email and password, and you're good to go!

GoDaddy's free trial is extremely generous, and gives you plenty of time to make sure it's the perfect builder for you. There's no risk and no pressure to sign up once the trial finishes – you only pay if you loved using GoDaddy!
Once your trial is over, you have four price plans to choose from, ranging between $9.99 and $24.99 per month (when billed annually). The Basic plan is the cheapest, and gives you all the usual essentials, such as SSL security and limited social sharing options.
For SEO tools you'll need the $14.99 per month Standard plan, and to accept bookings and payments for services or appointments you'll need the $19.99 per month Premium plan.
The Ecommerce plan is the most expensive, at $24.99 per month – this comes with sales tools such as discounts, shipping, and inventory management.
For now, though, simply start building for free and come back to pick your price plan once your trial is over – simple!
Before you move on, make sure you've:
- Clicked Start for Free
- Created your GoDaddy account
3
Select Your Industry and Website Title
Once you've signed up, you'll see this page in front of you, encouraging you to get started. This is the first step to actually building your site – and it couldn't be easier.

All you need to do is enter the industry your site comes under, and then the name of your website. As you do so, GoDaddy automatically creates an example page based on the basic information you've entered.

We wanted a website under the industry "Writer", titled "Lucy Loves Writing". GoDaddy instantly gave us this simple, stylish theme, centered around what we'd told it so far. You can play around with different industries and site titles to find one you're happy with – once you're satisfied, just click the Continue button.
Oh, and don't worry if you don't love every single thing about this first website – you'll get to customize it in a moment with GoDaddy's Websites + Marketing tools.
Before you move on, make sure you've:
- Chosen which industry your website comes under
- Thought of a name for your website
- Entered this information into your site
- Clicked Continue to carry on to the next stage
4
Start Editing Your Site: Pick Your Theme
Now you've got your base template, you can begin to edit it so that it's more unique and in-line with your own brand. The first thing to do is to pick your theme. Your theme changes the design and layout of your site, so it's important to choose one you like!
It's easy to change your theme – just click that Theme button, and you'll find tons of different themes for you to preview.

The basics of each theme remain the same, but the layouts and styles vary for each one.

This won't be the final version of your website, so don't worry if it's not 100% perfect – you'll get the chance to add your own images, text, pages, and more before you hit publish.
It's important to know your theme isn't set in stone – GoDaddy lets you go back and change your theme at any time, even after your site has gone live!
Before you move on, make sure you've:
- Had a look at a good range of themes – don't just stick with the first one you see!
- Previewed different colors and fonts
- Chosen a theme you love (but remember you can go back and change this at any time!)
5
Customize Your Design: Add Your Own Images
Images are super important for your website's success. Your theme comes with stock images already in place – but you probably want to add your own!
However, you might want to replace this stock image with a different one – maybe even photos you've taken yourself! To do this, click the Update button on the right-hand side of the image.
Here, you can upload your own images, browse free stock photos, or even connect to social media to add images at the click of a button.

If you're using the free stock imagery, you can make life easier by using the search feature. Once you've chosen your images, click Insert to see them appear on your website.
Top Tip! Don't forget to add alt text when you're putting images on your site. Alt text tells people what the image is about, which is useful if the image doesn't load, or if someone is using a screen reader. It's also very important for SEO (Search Engine Optimization), which is essential if you want your site to rank well in Google.
Below you can see the box where you type in your alt text – notice how your alt text also appears when you hover over the image.

Before you move on, make sure you've:
- Uploaded your own images into your Media Library
- Added new images to your website
- Formatted your images to suit your style
- Written alt text for any images you've added
6
Add Your Own Text
This is a simple but crucial step to customizing your website. Content is king in the website world, so you need to replace that stock text and put in your own killer content!

It's easy to edit the stock text already on your page, but you're more limited when it comes to moving or even adding new text boxes. You can't just click and drag text boxes around, and you can't add a single text box to your page.
Instead, you need to add a new section (we'll get to that next) and change the stock text that comes with it.
If you're writing a blog, simply click the Start Writing button and GoDaddy will open up a blog draft for you to start creating posts.
Top Tip! Your changes are saved automatically in GoDaddy, so you don't need to worry about losing any work you've done! It's a good idea to keep previewing your site as you go – this lets you see how your site will look live, helping avoid any unpleasant surprises once you're ready to publish.
Before you move on, make sure you've:
- Changed any stock text that came with your theme
- Added your own content to your site
- Started writing blog posts (if you're including a blog)
- Previewed your site to see your changes taking effect
7
Add New Sections
You'll notice your website already has four sections included – Header, About Us, Contact Us, and Footer. One of the best ways to make your site unique is by adding new sections – with this handy tool, you can add photo galleries, blogs, videos, menus, and more.
When you're editing your page, you'll notice blue buttons appearing with plus signs on them – hover over one of these, and the words Add Section will appear.
Click this button, then choose what type of section you'd like to add from the long list that pops up:

You can add up to 20 sections on each page, which should be plenty. The only sections you can't add are more Headers or Footers, but other than that, you're free to choose whatever you like from that impressive menu.
If you want to add lots of new content, it's best to add a Content section, as this means you can write as much as you like!
If you add a section by accident or decide you no longer need it, you can easily delete sections by clicking on them, then hitting the red Delete button at the bottom of the side bar that appears on the right.
Before you move on, make sure you've:
- Added new sections to your site
- Deleted any sections you don't need
8
Add Pages
Some website builders only let you build one-page websites, while others let you create complex sites with hundreds of pages. So how does GoDaddy work? Well, GoDaddy sits modestly in between these extremes – you can add up to 50 pages on your site, or keep it simple with a single page.
Adding pages is easy – simply go to your main website menu, then click the '+' button next to Site Navigation. You'll see a list of your existing pages underneath.

All you need to do now is give your new page a title, select the settings you want – for example, if it should appear in the navigation menu – and click Create Page.
Top Tip! Keep your page title short, as it will show up in your navigation menu. Long, complicated page names will make your menu cluttered and confusing.
Once you've created your shiny new page, you can start breathing life into it by adding sections to fill it up. Whether you want videos, contact forms, or even to embed custom code on the page, it's a blank canvas for you to play with.
Before you move on, make sure you've:
- Added as many pages as you need (this is optional – there's nothing wrong with a single-page site!)
- Deleted any pages you don't need
- Kept page titles short and clean
- Filled any new pages with content by adding new sections
- Ordered your pages into a structure you're happy with
9
Manage Your Site Settings
When you go into your Site Settings from the home menu, you'll find a ton of things you can add, edit, or enable. We'll explore four of the key features you might want to manage.
Site Profile
Your Site Profile is where you'll find the basic information for your website, such as your email, address, and site name. GoDaddy will automatically use the email you used to sign up, but you can replace this with a different address if you want to.
You can also change your business category here, or add a phone number or address. This is especially worth filling out if you're building a business site, as it helps to build trust with potential customers.
Search Engine Optimization
SEO is the art of getting found online. You can optimize your website to be found and favored by search engines like Google – there are all sorts of ways of doing this, but GoDaddy keeps it simple with its SEO tool.
Go to the SEO tab in your settings menu, and click Start Optimizing – this will take you to a new page, where you can go through GoDaddy's SEO Wizard. Here you can answer questions such as whether your audience is worldwide or local, explain what your site is about, and pick keywords from GoDaddy's suggestions.

GoDaddy does a great job of making SEO accessible to anyone and everyone – you don't need to understand any of the technical stuff to begin optimizing your site. It's not the most advanced optimization tool around, but for beginners, it's perfect.
Google Analytics
If you're serious about your website, the truth is, you want Google Analytics on your team. It's a popular, powerful tool that gives you valuable insights into how your site is performing, and how people are interacting with your site.
Top Tip! Make sure you've signed up to Google Analytics before trying to carry out this step. It's totally free, and really easy.
First, go to your Settings, and find the menu tab labelled Google Analytics.
When you sign up to Google Analytics, you'll be given a Tracking ID – if you have this to hand, then all you need to do is enter it into the labelled box in your settings, and let GoDaddy sort the rest out for you.
If you don't have it to hand, you can find your Tracking ID in the Admin area of your Google Analytics account.
Cookie and Tracking Alert
We're all familiar with pop-ups clamoring about cookies and data and permissions and giving us the best user experience. Most likely, you accept them without giving them a second glance.
When you're building your own website, however, you'll need to give a second thought to those cookie policies – it's the law!
GoDaddy provides you with a default cookie message that works fine for general sites. Make sure this is enabled in your settings before you publish your site, or it won't appear to visitors.
Depending on what type of site you're running, or which industry your business sits in, you might need to edit this to be a more specific and legally airtight message.
If you have a longer and very detailed policy, you can also add a privacy policy to your site – you do this by adding a new section to your page, and choosing the Privacy Policy option.
Before you move on, make sure you've:
- Updated and customized your site profile
- Optimized your site for search engines, to help boost your site's rankings once it's live
- Signed up for a free Google Analytics account and added it to your site
- Enabled the cookie alert message, and customized it if you need to
- Added a privacy policy if you need extra detail in your legal disclaimers
- Explored the rest of your settings to make sure it's all set to your preferences
10
Get Advanced
Now you've got the basics in place, here are three things you might want to add to bring an extra level of "wow" and professionalism to your website.
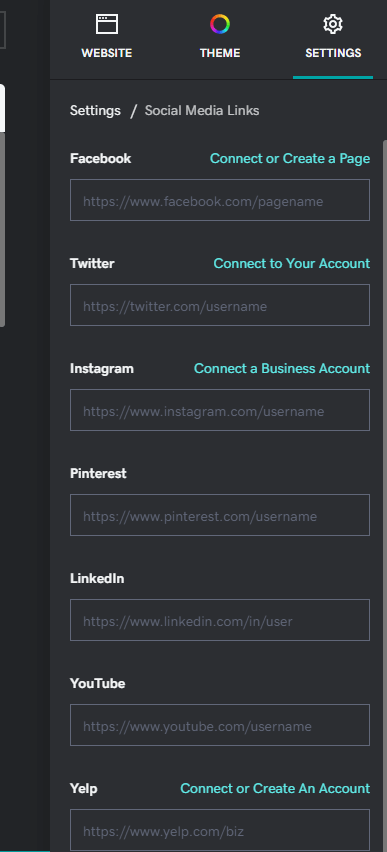
Add Social Media to Your Site
Stay connected by integrating social media with your website. You can add buttons linking to your various social media accounts, making it easy for visitors to find and follow you. Simply add a new section and select "Social". You can then link out to your social accounts by putting in the appropriate links.
Add Online Appointments
Business Plus and eCommerce customers can create appointment sections on their GoDaddy website. You can still try it out for free, though – click Add Section, then go to "Appointments & Services."
You'll need to enter the information and pricing details for these bookings in the dashboard of your site, but GoDaddy will guide you through the process.
This feature lets customers book appointments and services directly through your website. This looks really professional, and makes life much easier for both you and your clients!
Before you move on, make sure you've:
- Added a logo to your site header
- Connected your social media accounts to your website
- Created an appointments and services section on your site (if you need this feature)
- If you've set up appointments, manage your bookings in your GoDaddy dashboard
Further Information
- Create a professional logo for your site – read our helpful guide on How to Make a Logo!
11
Connect a Custom Domain
You're nearly there! The last thing to do before you can publish your site is to connect your very own domain name.
You can either connect an existing domain name if you already own one, or buy a new domain from GoDaddy.

If you need to buy a new domain, GoDaddy gives you a few suggestions based on the name of your site, or you can search for one yourself. You will have to pay for your new domain, but it shouldn't be too expensive – the ones we looked at cost $11.99 for the first year.
You can lock down your domain for up to 10 years if you want to!
Before you move on, make sure you've:
- Chosen a domain for your site – whether it's the free version, an existing one, or a brand new domain
12
Preview and Publish Your Site
It's time! You're ready to publish and share your site with the online world. In order to avoid any surprises, you should always preview your site as you build – but now it's time for the final check. Get someone else to look around your site as a test run before hitting the big green button.
Look out for broken links, images that won't load, or sections you meant to delete and forgot about. Once you're totally happy with your website, go ahead and hit that ultra inviting Publish button.
Congratulations – your site is online!
Before you move on, make sure you've:
- Previewed your site
- Tested your website to make sure there aren't any mistakes, flaws, or broken links
- Hit publish!
13
Promote Your Website
One last thing. Now your wonderful website is live, you need people to come and marvel at it – and preferably applaud (loudly). Now's the time to run email marketing campaigns using GoDaddy's Digital Marketing Suite, and to hook your visitors.
Simply add a Subscribe section to your site to encourage people to sign up – you can customize the wording, and even the layout, to make it really stand out.
If you're on the Business Plus or eCommerce plan, you can also list your business on Google. This benefits your business site as it boosts your visibility by showing your opening hours, location, and contact information within search results.
Go to your dashboard to list your business on Google, manage your email campaigns, and improve your SEO.
Before you move on, make sure you've:
- Added a subscription section to your site
- Created your first email campaign from your dashboard
- If you're a business, you should've listed your business on Google for better visibility
- Improved your SEO from your dashboard
How to Build a Website on GoDaddy: Summary
This article has led you through the steps of building your very own GoDaddy website, from signing up to sending off email campaigns to promote your shiny new site.
Though it may seem like a lot of steps, you can build a site at amazing speed thanks to GoDaddy's design assisted editor. Perfect for beginners who just want a simple site, or for anyone needing to get online fast, GoDaddy is an enjoyable website builder to use.
Now you know exactly how to build a website on GoDaddy, but the fun doesn't stop there.
Your website builder journey never really ends – you'll constantly be updating, changing, and managing your site. You can track your site's success from your GoDaddy dashboard, as well as through Google Analytics.
In case you need a quick reminder of how to build your website on GoDaddy, here are the steps outlined again below:
- Choose your site type
- Start your free trial
- Select your industry and website title
- Start editing your site: pick your theme
- Customize your design: add your own images
- Add your own text
- Add new sections
- Add pages
- Manage your site settings
- Get advanced
- Connect a custom domain
- Preview and publish your site
- Promote your website
You don't need to commit to a paid plan to try out these steps – all you need is GoDaddy's free trial, which lets you try before you buy. That way, you know exactly whether GoDaddy is right for you.
If GoDaddy doesn't tick all your boxes, your web building career isn't over. Try out Wix ADI, which works in a similar way to GoDaddy by creating a stylish website for you, based on the information you give it. The difference is you can choose to move your site into its regular editor if you decide you want more creative freedom, making it less limiting than GoDaddy's builder.
With a generous one-month free trial, there's no harm in giving GoDaddy a go – we've shown you the way, you've got the steps down, so what are your waiting for? Pave your own way to online success with GoDaddy's website builder, and enjoy the journey!
FAQs
Yes, and no – if you're building a store from scratch, then you will need to follow different steps (you'll need to add products to your site and set up shipping, for example). But our guide of how you use GoDaddy still applies for the basics of building your site.
No! Build your website as usual – when you want to start selling products just add an online store section to your site. You can upgrade to the eCommerce plan when you're ready to start making money through your website.
Yes! You can update and manage your site on any device, whether you're working from your laptop, phone, or tablet. This makes it easy to run your site on the go, and is available on all GoDaddy's plans.
No! GoDaddy hosts your website for you, meaning all you have to do is sign up, build, and publish your site. You don't need to worry about finding the right hosting plan or provider for your needs, or factoring extra hosting costs into your budget. GoDaddy's got you covered.
If you decide to sign up to GoDaddy and publish the beautiful site you've built, you have four price plans to choose from. The cheapest Personal plan starts at just $5.99 per month (billed annually). However, we recommend signing up to the Business plan for $9.99 per month, because it includes SEO, which is essential for getting your website found!
Building your site with GoDaddy is super simple, and there are helpful pop-ups to guide you through each stage. Still, we all need a helping hand every now and then – GoDaddy has a 24/7 support team available via phone. You can also use the live chat support from Monday to Friday, or browse the GoDaddy Help Center for answers.
Website Builder Expert aims to provide you with honest data. That's why we conduct our own research and obtain direct, personal insight. Click here for further information.
How To Create Webmail In Godaddy
Source: https://www.websitebuilderexpert.com/website-builders/how-to-build-a-website-on-godaddy/
Posted by: thibaultdianow.blogspot.com
0 Response to "How To Create Webmail In Godaddy"
Post a Comment